I love to give no-sew fleece blankets as gifts! They are warm, fuzzy, and they rarely get shoved to the back of the closet.
To make a no-sew fleece blanket, you don't need ANY sewing skills. None. It's great!
You will need:
Sharp scissors
Yardstick
ruler
Fleece (two kinds)
Let's talk about the fleece first. Fleece comes in different types, different qualities, and different colors and patterns.
For a no-sew blanket, you are going to want similar types of fleece, so if it shrinks, your blanket won't warp. I always suggest no-pill fleece because well...it doesn't pill in the dryer. It stays fuzzy and soft.
Fleece is normally between 58" and 60" (147cm and 152cm) wide, with the selvedge. The selvedge is the edge stuff that isn't always the prettiest, and often has brand and licensing information printed on it. You will want to trim this off before you start.
If you are doing a baby blanket, 1 yard of each fleece is enough.
Twin size you will need about 2 yards of each.
If you want to go bigger (such as a queen or king size blanket), you will have to stitch the fleece together.
Most blankets I make are made from 2 yards. I have gotten away with using panels before, but check the size first.
In my example, I used a bright floral with a neon pink. You want to contrast contrast contrast! Using two fleece of the same color won't give you as impressive as a result. The sky is the limit here with what you use, and your team colors (high school, college, pro-sports) are always a big hit! I will also apologize in advance for the blurry pics. My normal camera had died a horrible death, and these were taken with a camera phone. I have an easter blanket planned to do in the next few days, I will get better pictures then, and update.
First, spread your fleece out on the (clean) floor. 
Layer your two fleece pieces together, and trim them up so they are identical in size.
In the above picture, you can not only see the contrast, but you can see how they line up.
Now is where you get your ruler. I use my clear grid rulers (for quilting) because they give me a reliable guide, but you can use a standard school ruler.
Start in one corner, and mark then cut out a 6 inch by 6 inch square.(15cm)
Now to cut...
Carefully cut out all 4 corners.
Use your yard stick or straight stick to line up a 6 inch (15cm) line all the way across your blanket. Your stick might not go that far, and thats fine, if you are careful during the next steps, you can measure up your 6 inch (15cm) line and leave your stick on it
Now you want to cut 1 inch (2.5cm) strips, 6 inches (15cm) up, all along the edge.
For your sanity, only do one side of the blanket at a time.
Got your side cut? Good! Now you start tying.
Tie it in a knot, looping twice. This will bring the "back" fleece to the front, and send the "front" fleece to the back.
Work your way around the blanket. Make sure you knot it fairly tight and don't leave any gaps between the front and the back.
When you are done, it should look something like these photos: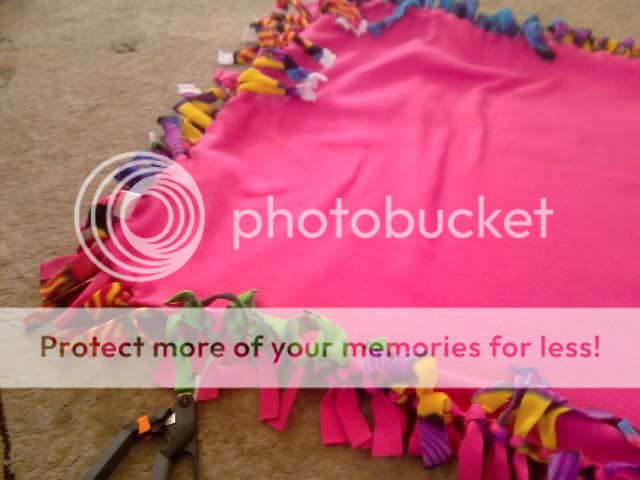

Happy no-sewing!
If you have any problems or questions, please do not hesitate to email me at karlee@uniquebykarlee.com and I'll do my best to get to you as soon as possible!
Beads, Beads, and more Beads!
2 weeks ago


1 Unique comments:
Hi, I just found your blog and love this no sew fleece blanket. In fact I think I am going to try this one on my own. Maybe you can check our my blog www.homemakinghoneys.com we are having a give away right now if you are interested in entering.
Post a Comment